 | | | Photo Jim Hurley | | | | | | " She could see the valley barbecues; From her window sill; See the blue pools in the squinting sun; Hear the hissing of summer lawns." ~ Joni Mitchell
 Joni Mitchell's amazing lyrics invoke a compelling image from the sound of sprinklers, as she sings about life in a suburban home. The title track of her album "Hissing of Summer Lawns" (1975) elevates the mundane irrigation system to represent "the good life."
Even as we Californians recover from what one meteorologist called a "Conga Line of atmospheric rivers" that just blew across our state, it is now time to think about your irrigation system and the hissing of your summer lawn.
Automated irrigation systems (we used to call them sprinklers) need routine maintenance to keep the system running as intended. If you have a gardening service, do not assume they are handling this task for you. Ask them if they are doing this maintenance. If not, you might ask them how much to include it or hire a new service that does. If you have a couple of hours to spare a couple times per year and enjoy working in your garden, you could do this task yourself.
Modern irrigation systems consist of programmable timers (clocks) which automatically run valves that supply water to dripper and sprayer nozzles. Doing your own maintenance means understanding each of these components. You must know how to operate and program your clock, know how to cycle and test your valves, and know how to inspect and discover malfunctioning lines and emitter heads. Bottom line: Learning this now will help immensely when problems do occur.
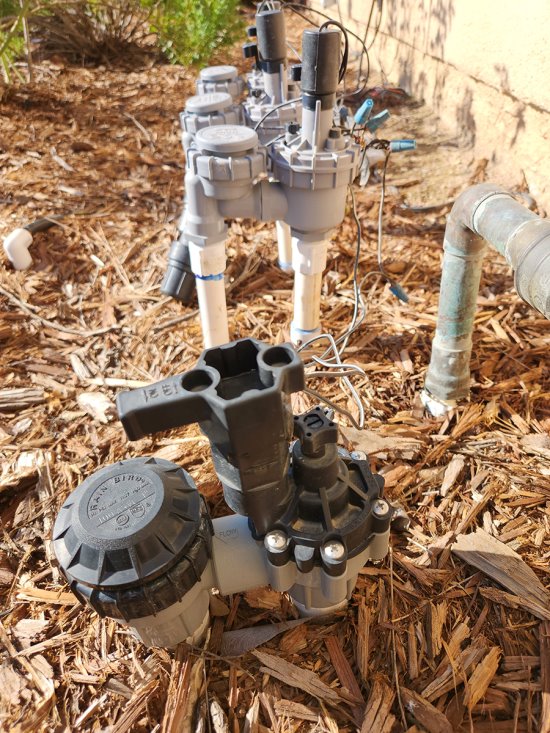
I usually start by checking the irrigation valves. Is your water bill high? One of the valves may not be shutting off completely. How will you know? One sure indication is at your water meter. Somewhere in front of your house is a box in the ground that says "water" on it. The water meter resides in there. You may need to move some accumulated dirt out of the way and there may also be a flap covering the meter that you must flip open. Once you can see the meter dial, you will see a gear or wheel that spins when water is flowing. Turn on your garden hose and watch the wheel spin like crazy. Shut off all the water at your house main and make sure the wheel completely stops spinning. If you have separate shutoffs for the house and the irrigation valves, turn off the house and turn on the irrigation system. Check the wheel again, if the irrigation valves are off and the wheel is turning, one of the valves is leaking.
Next, locate your irrigation clock (or clocks) and learn how to operate it. Some clocks are in the garage. Some are outside on a wall near the valves. Run each valve (station) manually and note which sprayers or drippers are running. Make sure each valve shuts off completely. Just like hissing lawns, valves make noises. When you turn one on, it goes "whoosh" and sometimes you can hear the water running through the pipe. When you shut it off, it goes "slurp - clunk" as the valve diaphragm drops back into place. These sounds are good. Sometimes, if it is not shutting completely off, you'll hear a slight hissing or humming as water continues to run through the valve. Drip irrigation lines operate under pressure, so be patient and let the back pressure dissipate before you decide the drip line valve is not working.
When you've determined that a valve is not behaving, you have a couple of options. Sometimes the leak is caused by tiny bits of debris caught in the diaphragm of the valve. First option, take the valve apart, clean it, and reassemble it to fix this problem. If you are good at mechanical repairs, you might try this. Be careful not to lose any screws or the spring inside the valve, and note which side is up for the diaphragm. Unfortunately, older valves are cranky and tend not to come apart or go back together, so you may need a new valve.
Option two is replacing the valve. Many systems have the valves above ground, and they are pretty easy to replace. Some are in valve boxes below the ground and will require some digging to replace. Make a note of the size of the pipe connecting the valve. On homes, it is typically 1/2 inch or 1 inch. You will need to get a new valve and fittings at the hardware store or irrigation supply. Take a couple of very clear photos from different angles with you.
With routine maintenance your system should continue to run smoothly for many years. You can relax and enjoy the beauty of your garden and the hissing of summer lawns. |