| | Published August 9th, 2017
| The perfect pick: Huckleberry pie
| | | By Susie Iventosch | 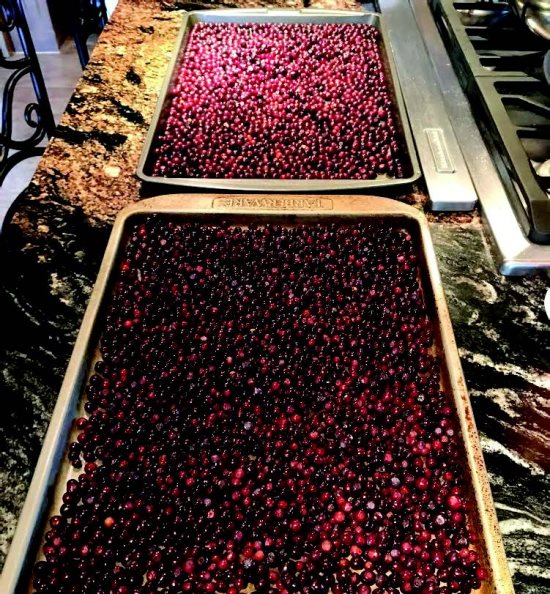 | | A bumper crop of huckleberries Photos Susie Iventosch |
This is the very first year I've ever gone huckleberry picking and even though I was dragging my feet when my husband suggested we go, I had a wonderful time once I was out there. It is so much fun, especially when you find a good plant with lots of huckleberries on it. It's even better, when the plant is tall enough so that you don't have to crouch down on hands and knees to pick the berries.
 I've read that huckleberry plants grow anywhere from two feet up to about 10 feet or more if they're situated in the shade, but in the patch we worked, the plants were about four feet tall, and were in full afternoon sun. They tend to grow up a hillside, so we worked our way up the hill so as not to trample bushes we had yet to pick. When picking wild berries, always make sure you're with someone who knows what they're doing and who can identify edible versus poisonous berries. This is a great idea for any sort of wild foraging you might endeavor.
Huckleberry picking requires patience, because some of the bushes have merely one or two berries, while others have 20 or more. The berries are often hidden underneath the leaves, which requires lifting the branches and turning them over to see what you find. Some people use a string and bucket to pick the berries, which allows lots of leaves to fall into the mix. We simply picked each berry by hand, and even though it's a bit slower process, it made for easier cleaning once we got home. We used a plastic milk jug with the top cut off to collect the berries, but I suggest having a second container with a tight-fitting lid to transfer them after each cup or two are collected. When a horsefly came buzzing by, I was startled and spilled two cups of this precious booty on the ground. Lesson learned.
After spending almost two hours picking, we measured the crop and we had roughly four cups of berries, which is not nearly enough to make a whole pie. So, the next day, I went back out and wound up with about 10 cups of berries! This was plenty for a pie with some leftover for snitching. After I washed the berries, and set them in a single layer on a baking sheet to air dry, the whole kitchen smelled of those divine berries.
Huckleberries are much smaller and tarter than blueberries, but you can make a pie using almost the exact same recipe for both. You might add slightly more sugar to the huckleberry pie, or you might not, because part of the glory of huckleberries is the mingling of sweet and tart bursting with flavor.
We picked our huckleberries in Idaho the last week of July, but the season for California huckleberries is a bit later, more into August or September. The variety of huckleberries found in California are Vaccinium ovatum, while the Idaho berries are generally Vaccinium membranaceum or deliciosum. I'm not a botany expert, so you might find more varieties in both states than those I know.
For more information about California huckleberries please visit:
https://baynature.org/article/in-search-of-an-elusive-yummy-california-native/
https://honest-food.net/berries-of-the-coastal-range/wildhuckleberry.com/ 2014/08/28/huckleberry-picking-canada-california
|
| |
Cooking Term of the Week
Kamut
Kamut is an ancient grain, cultivated in Egypt roughly 4,000 years ago. I first had it in a small restaurant in Seattle, and it was served as a chilled salad with sun dried tomatoes, feta cheese and some kind of yummy vinaigrette. It is kind of like a barley or even a wheat berry in texture, firm with a nice chewy bite when you eat it. It can be served hot or cold, but I love it as a primary ingredient in a grain salad. It could easily be mixed with other grains, as well. The grain is also known as Khorasan wheat or Pharoah grain, because Kamut grains were discovered in ancient Egyptian tombs. Kamut has more protein and fiber than wheat, roughly 30 percent more, and can be more tolerable for those who have issues or problems with traditional wheat. | | Huckleberry Pie
| | | | 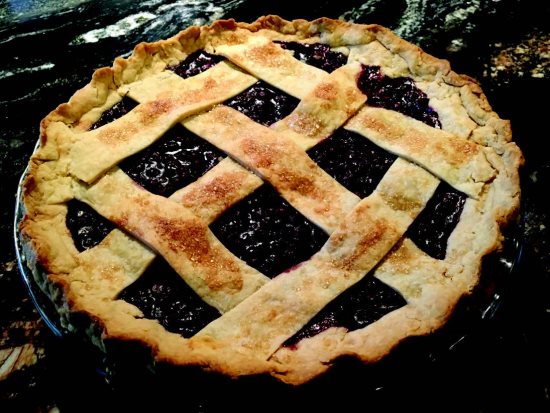 | | Huckleberry pie, ready to enjoy! |
(Recipe for one 9- or 10-inch pie)
INGREDIENTS
Crust
2 cups all-purpose flour
1/2 tsp. salt
1 and 1/2 sticks (12 tbsp.) unsalted butter, chilled and cut into small cubes
2 tsp. cider vinegar
1/4 to 1/2 cup ice water
Filling
8-10 cups huckleberries (can mix with other berries, too)
1/2 cup flour
1/2 tsp. salt
1/2 cup brown sugar
1/2 cup white sugar
1 tsp. cardamom
1 beaten egg white for on top of lattice crust
4 tbsp. raw sugar or granulated sugar for sprinkling over the lattice crust
DIRECTIONS
Preheat oven to 420 F.
For crust, place flour and salt in a large bowl. Using a pastry cutter, or your fingertips, cut butter into flour until butter is integrated and just tiny pea-sized pieces remain. Stir cider vinegar into mixture with a fork. Slowly stir in water, a little bit at a time, (no ice) into the flour mixture until you are able to gather the mixture into a ball. Now, divide the dough in half, but one half slightly larger, using the larger one for the bottom crust and the smaller one for the lattice top.
With a rolling pin, roll dough out on a well-floured board or pastry cloth into a circle that is about 1 1/2 to 2 inches wider than the top outside edge of the pie dish. Lay pastry into the dish, fitting it into the bottom and sides of the dish, leaving about a 1 1/2 to 2-inch overhang. Set aside.
Roll out the second ball of dough to a circle roughly the same diameter as the top edge of the pie dish. Cut into 1- to 2-inch strips. Leave on board until ready to assemble pie.
For the filling, place washed berries, flour, salt, brown sugar, white sugar and cardamom in a large bowl. Gently toss so that sugars and flour begin to blend in with the berries. You will still see plenty of white, but don't worry, it will all cook down together.
Pour berry mixture into pie dish lined with the bottom crust.
Now, using a lattice pattern, lay half of the pie dough strips going in one direction, and the remaining pieces crossing alternately over and under the pieces going in the original direction. (See photo.) Tuck the ends of the strips into the top edge of the pie dish and roll the excess dough from the bottom crust up and over, giving it a fluted edge.
Brush tops of lattice crust with egg white and sprinkle with sugar.
Bake at 420 F for approximately 45 to 50 minutes, or until crust is golden brown and filling is bubbly and hot all the way through. If you find that you need more time for the filling, but the crust looks done, loosely cover the top of the pie with a piece of foil for the remainder of the bake time.
Remove from oven. Pie may be served hot, warm, room temperature or chilled and garnished with ice cream or frozen yogurt. The cooler the pie is when serving, the less runny the filling will be. If you like to serve it warm, you can always cool completely and reheat, too. This will help the filling gel a bit before serving.
| | | | | | | | | |