| | Published July 21st, 2021
| Some assembly required
| | | By Jim Hurley | 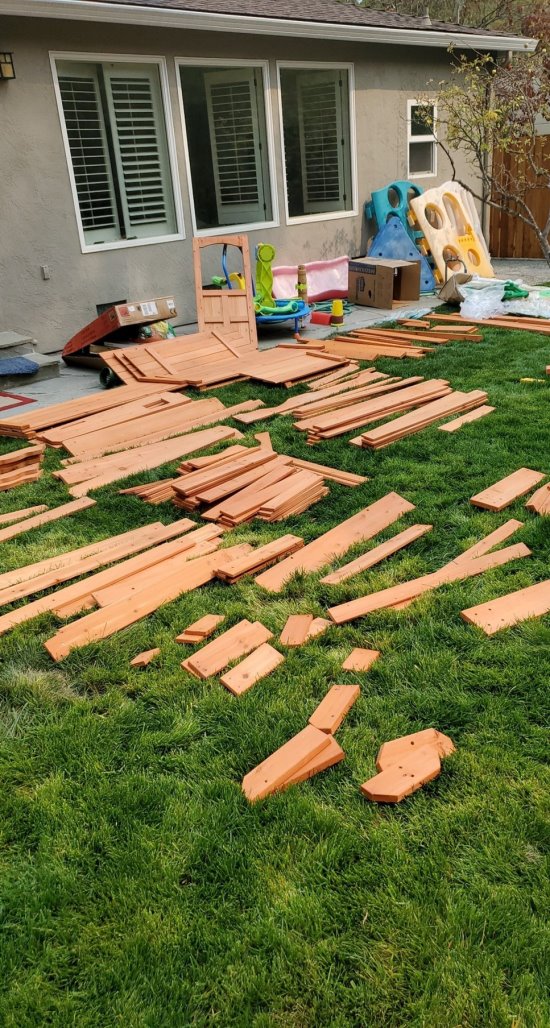 | | Sorted Parts |
Periodically, I get this call. "We bought a (blank), and need help assembling it." IKEA made it famous by doing it in Swedish, but knock-down furniture, playhouse kits, and closet "space savers" all come with that phrase printed neatly on the side - "Some Assembly Required" - and Sven is not coming over to help you. These products seem deceptively easy on the outside with a beautiful picture on the box. But inside is a dizzying puzzle full of odd pieces, similar but somehow different pre-cut boards, screws, bolts, hinges, slides, and tacks.
 So just dump out the box and dive right in? Whoa, Red Rider, my experience has been that it is best to have a methodical approach to these puzzles. Here are a few Do's and Don'ts.
Don't start unless you have time to finish. Some boxes or instruction books give you an estimated time to complete. If this is your first time, double that estimate.
Do read the instructions. Open the box and find the instruction booklet. It might be in the bag of hardware; it might be under the boards. It is usually helpful to quickly scan the whole book to get an idea how clear the instructions are, how many steps it will take, and in what sequence the parts are built. Dressers will have drawers to assemble. The first one will take twice as long as the rest. Some projects start from the back to the front, some are top to bottom.
Pre-reading the instructions will also give you a better sense of how they are "written." Many international manufacturers only use pictures with arrows and numbered parts indicated. Some provide a big picture with closeups of complicated tasks in a circle to the side with an arrow showing where that belongs. Learn the numbering system itself: attach part A to part B or, AA to BB, or as the level of complexity increases Bolt G10 to E10 and E11 to G11. I worked on a playhouse with boards stamped RSL, SS, CB, and FBP (Turns out they were for Roof Ship Lap, Side Slat, Corner Bead, and Floor Board Plank.)
Do sort out the pieces before you begin assembling. Open the box (or boxes) and lay each piece on the floor in some semblance of order. Stack the A's together, B's next to A's and so on. Do the hardware the same way, if the nuts, bolts, and screws are all in the same bag, open that up and sort them by type and size. Some kinder vendors will bag the hardware in groups with symbols (circle, triangle, square). If that is the case, best to leave them in the bags. The instructions will tell you when each bag is needed. This may seem like a waste of time, but when the book calls for part K2, you'll know where the K's are and likely know which one is K2, saving time in the long run.
Do familiarize yourself with the hardware pictures. If there are both wood screws and machine screws, identify how the instructions depict them. Could save confusion and reworking later.
OK, you've sorted out the pieces, stacked them neatly and are ready to begin.
Don't tighten the screws prematurely. When fitting several parts into place, it is easier to line up screws, bolts, and slots if there is a little play in the other ends. For example, if you are making a box for the drawer, put three sides together leaving the fasteners loose. You can drop in the bottom piece and add the fourth side more easily. Do remember to tighten all the fittings when it is done though.
Do keep a careful eye on the instructions. Watch for a repeated process. They will indicate that you assemble four components the same way with a "x4" in the picture frame. If pre-drilled holes are indicated on the side boards, there might be two at the top and only one at the bottom, or there may be a slot running down one side. Catching these indicators helps prevent putting something on backwards or upside down and prevents starting over when holes don't line up later.
Don't overtighten screws. Unless you have a magnificent control over your power driver, use a handheld screwdriver or wrench to tighten screws and bolts. A lot of furniture is made of particle board that will break or flake if you force the screw or overtighten. (This is indicated at the beginning of the instructions by a picture of a Drill with a circle/bar over it.)
Final Tip: If you get started and find yourself overwhelmed, there might be a How-to video on YouTube or the vendor's website to watch.
Relax and enjoy your puzzle and if it is from IKEA, Sven says,"lycka till." |
 | | Assembled Parts |  | | Jim Hurley is an independent handyman with over 25 years of experience in residential repairs. Hopefully this free advice is helpful to someone attempting Do-It-Yourself home repairs. The information presented is intended for informational purposes and for use by persons having appropriate technical skill, at their own discretion and risk. | | | | | | | | | |