| | Published October 27th, 2021
| Stop the drips
| | | By Jim Hurley | 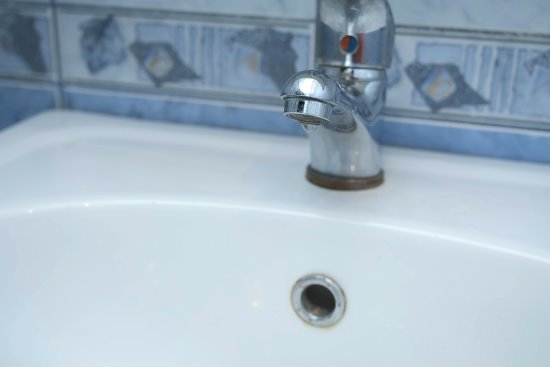 | | bigstock images |
We've all seen a comedic scene in shows where the protagonist can't sleep because the noise of a dripping faucet is driving them to distraction. In reality, especially during a prolonged drought, that drip is a waste of precious water.
 Here's how drips happen. Faucets are simply valves which control the flow of water into the sink. Your household water supply is under very high pressure, so just the slightest damage or wear on the seals inside the faucet valve will allow water to squeeze through and cause that drip.
In the old days, a good handyman would carry a little box of black rubber washers in various sizes and shapes to a house call. The repair was simple: just shut off the water supply, unscrew the tap, and replace the washer. Then came cartridges. A modern faucet has a cylinder inside called a "cartridge" to control the flow of water. Cartridges come in all shapes and sizes. Unless you have a very old faucet with washers, a DIY repair for drips goes something like this:
1. Shut off the water supply valve under the sink.
2. Remove the cartridge from the faucet. Make a note of the faucet manufacturer if possible.
3. Take the cartridge to the hardware store. (Find the old guy who knows what to look for and where to find it and hope they have a cartridge that is an exact match in size.)
4. Return home and install the new cartridge.
5. Turn on the water and see if that fixed the problem.
This is not always easy.
When shutting off the supply valve under the sink, turning the valve handle may cause a drip to start from the valve stem. Before you start, remove any items under the sink to keep them dry and to make it easier to observe the floor for drips. Turning off the valve may also not completely shut off the flow of water to the faucet. In some cases, the shutoff valve also has a washer that may also be faulty. If this happens, you will need to shut off the house main water supply and replace both the shutoff valve and the faucet cartridge.
These shutoff valves deserve an entire article of their own. In brief, there are two types of shutoff valves; one that screws shut, (turn the handle several times to close the valve), and one that stops at a quarter turn. The quarter turn type (a ball valve) is the best. If the screw-down type needs replacement, buy a quarter turn valve of the same size.
Faucets are so varied in design that it would be impossible to explain how to remove the cartridge for each one. You will need to be creative and gentle as you discover how to remove the handle, which may be stuck on very tight, and disassemble the valve to remove the cartridge.
And not all hardware stores are equal. Find a good one with a variety of replacement parts and a knowledgeable salesperson. An alternative is to go to a plumbing supply house but, unfortunately, they are typically not open on weekends.
Once all the pieces are off - without you losing or breaking them - be sure to stack them carefully on the counter in the order that they came off, so that you can reassemble them in order.
Provided you do all those steps successfully, the problem may still not be resolved because sometimes the valve base is damaged, and the drip is from the valve housing rather than the O ring on the cartridge.
Before you spend this much time and energy on repairing the old faucet, you might consider replacing the whole thing. This may not require buying a new one because most faucets come with a limited warranty and some even have a lifetime warranty. If you have the documents that came with the faucet, (anything with the name and model number on it), call the manufacturer's customer service line and they will send you a replacement. Even if you only know the manufacturer, call their service line and they can use a photograph of the faucet to look up the make and model for you.
If replacement parts are not available, you will need to buy a new faucet. Replacing the whole faucet has only one major challenge: You will need to remove the nut under the counter that holds the old one in place. It is typically a tight space, and the fastening nut may be rusted or just won't budge. The hardware store sells an "Offset Sink Wrench" ostensibly to reach up under the counter and loosen the nut. I have never seen one of those actually work. What I use is my Multi-Tool with a metal cutting saw blade to cut through the nut and then pry it off with a screwdriver.
If you reach a point where it just won't come out, it's time to call your favorite handyman or plumber. |
 | | Jim Hurley is an independent handyman with over 25 years of experience in residential repairs. Hopefully this free advice is helpful to someone attempting Do-It-Yourself home repairs. The information presented is intended for informational purposes and for use by persons having appropriate technical skill, at their own discretion and risk. | | | | | | | | | | | |


